How to Install a Screen Protector on Tesla Model 3 / Model Y
Upgrading your Tesla screen with a matte protector helps eliminate unwanted reflections and finger smudges while maintaining crisp visual output. This guide walks through the exact process for installing both the front and rear screen protectors based on the video tutorial from ureviews on YouTube.
Essential Preparation Rules
- Eliminate Airflow: Turn off the car’s AC to prevent floating dust particles from landing on the display during application [00:00:45].
- Enable Screen Clean Mode: Turn on Screen Clean Mode in the Tesla settings menu before starting the front display prep [00:05:14].
- Clean the Protector Backing: Wipe down the protective film on the back of the screen guard prior to placing it over the dash so trapped dust does not transfer to the glass [00:01:01].
- Avoid Suction Cups: Skip the included suction cups for the rear display; manual alignment using the top corners provides a cleaner fit [00:03:35].
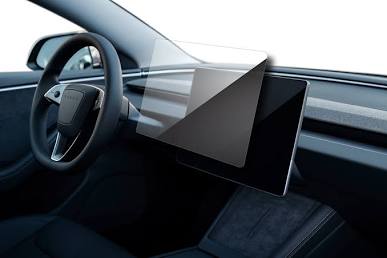
Step-by-Step Tesla Screen Protector Installation Guide
- Prepare the Vehicle and EnvironmentTiming constraint: Must be completed before peeling any filmCompleting a Tesla screen protector installation on your Model 3 or Model Y is the best way to eliminate unwanted reflections and finger smudges while maintaining a crisp visual output. This guide walks you through the exact process for installing both the front and rear matte protectors, based on the video tutorial from ureviews on YouTube.
- Install the Rear Screen ProtectorRear display application
- Wipe down the display thoroughly with the provided wet cleaning wipe, followed by the dry microfiber cloth [00:02:32].
- Use the dust-removal sticker to catch any micro-particles, using a light source to check for missed spots [00:03:00].
- Line up the protector evenly with the top corners of the screen [00:03:43].
- Press firmly in the center and allow the adhesive to spread outward [00:03:43].
- Use the included squeegee to push remaining air bubbles to the edge. If a large bubble remains trapped, gently lift the corner nearest to it to release the air pocket [00:04:08].
- Prepare the Front DisplayMain touchscreen prep
- Clean the screen perimeter and surface using the wet wipe, removing all fingerprint oil [00:05:07].
- Dry the entire display with the microfiber towel [00:05:40].
- Use the dust sticker across every square inch of the screen to ensure a 100% dust-free surface [00:05:51].
- Wipe down the back side of the application frame to prevent loose dust from dropping onto the glass [00:06:09].
- Mount the Front Alignment Frame and SqueegeeFinal front application
- Place the installation alignment frame directly over the front display [00:06:15].
- Pull the release tab to peel away the inner protective film.
- Use the squeegee tool to press down across the center and push all trapped air bubbles out toward the outer border [00:06:24].
- Peel off the outer protective film layer and unclip the alignment frame from the screen [00:06:44].
Key Takeaways
- Dust is the enemy: Any particle trapped beneath the tempered glass creates a permanent air bubble that cannot be squeegeed out [00:01:15].
- Matte vs. Glossy: The matte finish successfully eliminates driver-side sun glare without altering screen touch sensitivity or color accuracy [00:00:23].
For product details and purchasing options, check out the InnoShore Matte Screen Protector Video & Link.
Disclosure: This post contains affiliate links. We may earn a commission at no extra cost to you. Prices are accurate as of publication date.